Understanding the detailed process behind professional asphalt driveway installation helps you make informed decisions and avoid costly mistakes.
Share:
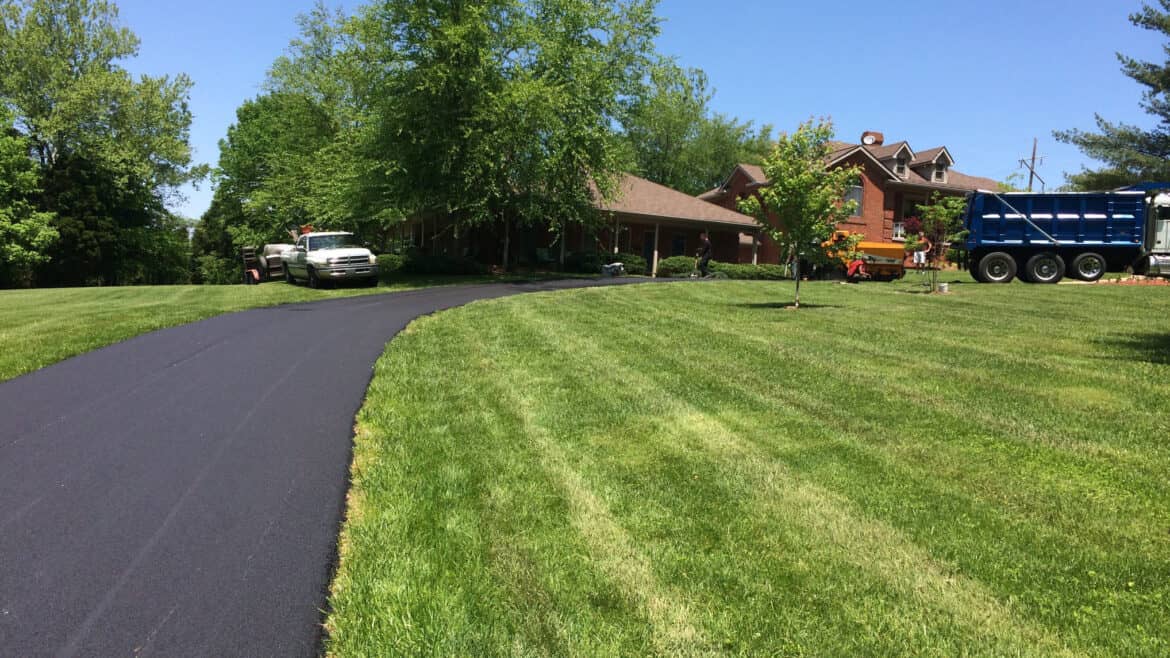
Your driveway faces unique challenges that parking lots and roads don’t encounter. It deals with concentrated vehicle loads in the same spots every day, sits directly adjacent to your home’s foundation, and often handles drainage from multiple directions.
Professional asphalt driveway installation accounts for these specific stresses. The process starts with understanding your property’s drainage patterns, soil composition, and how you actually use your driveway. This isn’t about following a generic checklist – it’s about adapting proven techniques to your specific situation.
The difference between quality installation and corner-cutting becomes obvious within the first few seasons. Proper installation prevents the common problems that plague cheap jobs: edge cracking, settling, drainage issues, and premature deterioration.
Everything starts with what happens before the first truck arrives. Proper site preparation determines whether your driveway will last 15 years or need repairs within three.
The excavation process removes existing materials and digs down to stable soil. In Wilson County TN, this often means dealing with clay soils that expand and contract with moisture changes. We test the soil stability and adjust our approach accordingly. If the existing soil won’t provide adequate support, it gets replaced or stabilized.
Drainage planning happens during this phase, not as an afterthought. Water is asphalt’s biggest enemy, and proper installation creates multiple layers of protection. This includes establishing proper grade slopes, installing drainage systems where needed, and ensuring water moves away from both your driveway and your home’s foundation.
The base material selection and installation creates the structural foundation for your driveway. This typically involves crushed stone or gravel, installed in specific thicknesses based on your soil conditions and expected traffic loads. Each layer gets compacted to precise specifications using professional equipment. You can’t achieve proper compaction with hand tools or lightweight equipment.
Proper base preparation takes time and requires the right equipment. Contractors who skip steps here are gambling with your investment. The base layer bears the actual structural load – the asphalt surface is primarily a wearing course that protects the base and provides a smooth driving surface.
Want live answers?
Connect with a Tristar Paving expert for fast, friendly support.
Asphalt installation is as much about timing and temperature as it is about technique. The material has a narrow window where it can be properly worked and compacted, and we plan every aspect of the process around these constraints.
Weather conditions determine when quality installation is possible. Temperature, humidity, and wind all affect how the asphalt behaves during installation. We don’t just check the weather forecast – we understand how different conditions affect the material and adjust our techniques accordingly.
The actual installation process involves coordinated teamwork between multiple crews and pieces of equipment. Each step builds on the previous one, and there’s no opportunity to go back and fix mistakes once the material cools.
Not all asphalt is created equal, and the mix design affects everything from initial installation to long-term performance. We select materials based on your specific application, not just what’s cheapest or most convenient.
The aggregate composition – the stone and sand mixed with the asphalt binder – determines the finished surface’s strength, texture, and durability. Different aggregate sizes and types create different performance characteristics. For residential driveways, the mix needs to balance durability with a smooth, attractive surface.
Asphalt temperature at delivery and during installation affects workability and final compaction. The material arrives from the plant at around 300 degrees and must be installed before it cools too much to work properly. This creates time pressure that requires careful coordination between the asphalt plant, delivery trucks, and installation crew.
Quality control during installation involves monitoring temperatures, checking compaction levels, and ensuring proper joint construction where the new asphalt meets existing surfaces. We use infrared thermometers and other tools to verify that conditions remain within acceptable ranges throughout the installation process.
The thickness of the asphalt layer gets determined by your specific traffic loads and base conditions. Residential driveways typically receive 2-3 inches of compacted asphalt, but this varies based on soil conditions, expected use, and other factors. Thicker isn’t always better – proper base preparation is more important than extra asphalt thickness.
Proper compaction transforms loose asphalt into a dense, durable surface that can handle years of traffic. This process requires the right equipment, proper technique, and careful attention to temperature and timing.
The compaction process typically involves multiple passes with different types of rollers. Initial breakdown rolling happens while the asphalt is still hot and workable. Intermediate rolling achieves the target density, and finish rolling creates the final surface texture. Each step serves a specific purpose and can’t be rushed or skipped.
Edge compaction receives special attention because edges are vulnerable to cracking and deterioration. Hand tampers and smaller equipment ensure proper compaction in areas where large rollers can’t reach. Professional installation includes proper edge support and finishing techniques that prevent premature edge failure.
Surface texture affects both appearance and performance. The final rolling pattern creates the surface texture that provides traction while allowing water to drain properly. Too smooth and the surface becomes slippery when wet. Too rough and it’s difficult to keep clean and may cause tire wear.
Joint construction where new asphalt meets existing surfaces requires careful attention to ensure proper bonding and prevent water infiltration. These transitions are common failure points if not properly executed. We use techniques like tack coats and proper joint sealing to create lasting connections.
Quality installation includes a final inspection to identify and address any issues before the crew leaves. This includes checking for proper drainage, smooth transitions, and uniform surface texture. Any problems get corrected while the equipment is still on site and the asphalt is still workable.
Understanding what goes into proper asphalt driveway installation helps you make informed decisions and avoid costly mistakes. The difference between quality work and shortcuts becomes obvious once you know what to look for.
Your driveway represents a significant investment in your property. Quality installation protects that investment and provides years of reliable service. The extra cost of doing it right the first time is always less than the cost of repairs or replacement later.
When you’re ready to move forward with your asphalt driveway project, TriStar Paving brings the expertise and attention to detail that quality installation requires. We understand what it takes to build driveways that last in Wilson County TN’s specific conditions.
Article details:
Share:
Continue learning: